Understanding Git & Basic Git Commands
 Git is a version control system originally created back in 2005 for tracking changes in files. It is a decentralized version control system, meaning many developers can work on the same project without having to be on the same network.
It helps keep track of your code history, allows for collaborative development, and enables you to know who made what changes and when.
Commands
To begin, open up your terminal and navigate to the folder where your project is on your local machine as shown below

- git init : will initialize a local git repository in your project. This command will create a hidden .git folder

- touch ‘filename’: to create a file via your terminal, you use the touch keyword and the filename as shown below. That file is immediately added to your local repository (project folder)

git config — global user.name “Your name”: adds your name to Git
git config — global user.email “Your email”: adds your email
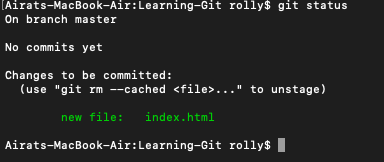
git add ‘filename’: will add the particular file to your staging area. After running this command, you don’t see any notification about the file being added, however, you can run the git status command to check that the file has been added to your staging area

git add . : will add all the files in your project at once as opposed to doing many git add ‘filenames’ git status: lets you see which changes have been staged or not, and which files are not being tracked by Git
git status: lets you see which changes have been staged or not, and which files are not being tracked by Git
git commit: the commit command is used to save your changes to the local repository. Options for the commit include; -m, — amend
git commit -m “Commit message”: which sets the commit message, be sure to use a description that you and your team understand

- git commit — amend -m “Updated commit message”: enables you to update the last commit message.

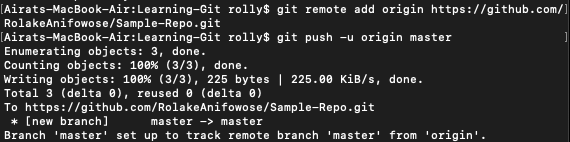
- git push: the git push command is used to upload the content of a local repository to a remote repository. Before you can push, you need to have created a repository on Github. Login to your Github account and create a new repo.
git pull: is used when you want to pull the latest changes from a remote repository into your local repository
git branch ‘branchname’: say you want to work outside of the master branch, this command enables you to create a new branch where you can push your code and then later merge with the master
git checkout ‘branchname’: switches you to the separate branch you created

- git clone: will clone an already created remote repository into your current folder
Keep in mind that you do not need to cram these commands, a simple Google search will provide you with what you need.